
If you need 10 to 30 parts that look close to injection molded production parts, a vacuum casting prototype often saves both time and money. That matters when your team needs investor samples, pilot builds, test units, or customer demos before hard tooling makes financial sense. The process sits in a useful middle ground between one-off machining and full production molding.
We see this choice come up when product teams are under pressure to validate design decisions without locking into steel tooling too early. A CNC part may hit tight tolerances and perform well in testing, but it can also misrepresent final appearance, wall behavior, or material feel. Injection molding solves that problem later, but the tooling cost and lead time are hard to justify when the design is still moving.
What a vacuum casting prototype actually does well
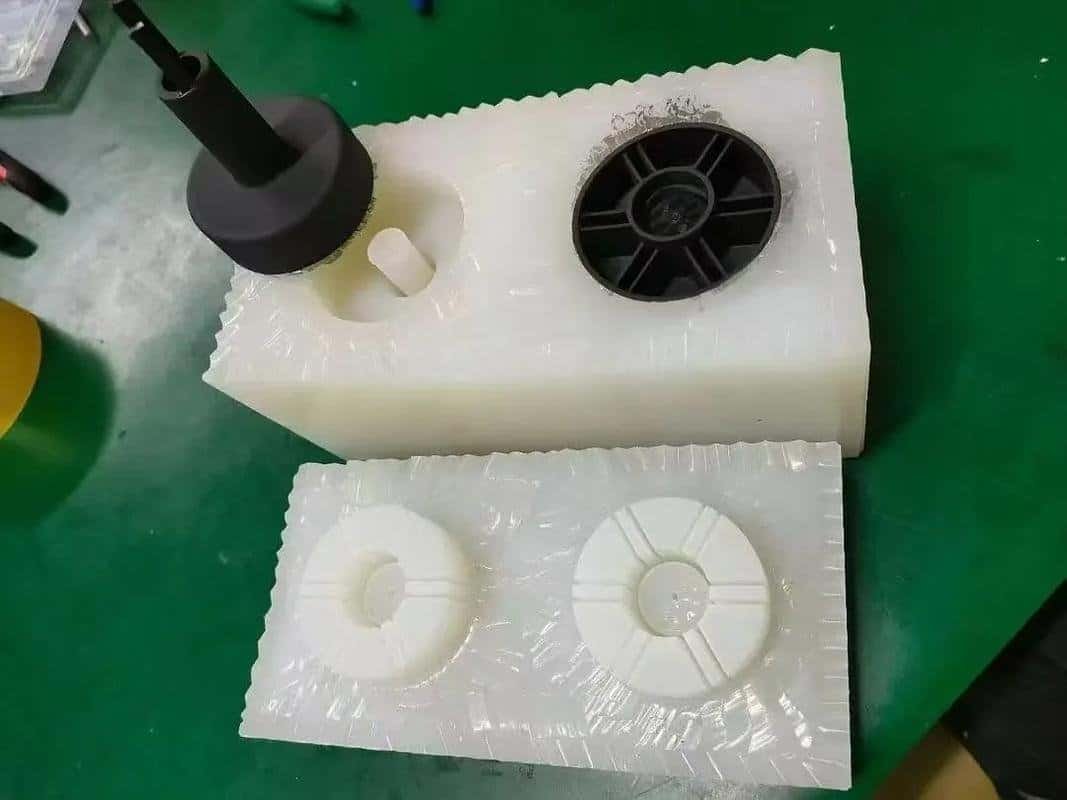
Vacuum casting starts with a master model, often made by CNC machining or 3D printing. That master is used to create a silicone mold. Polyurethane resin is then poured into the mold under vacuum, which reduces trapped air and helps the resin fill fine features more consistently. The result is a small batch of parts that can closely mimic production plastics in appearance and general performance.
This process is strong when you need visual realism and low-volume flexibility at the same time. It supports transparent, colored, rubber-like, and rigid resin options. Surface finish can be very good, especially when the master model is prepared properly. For housings, covers, handheld enclosures, brackets, and display samples, vacuum casting often gives a more production-like result than standard 3D printing.
The commercial value is simple. You reduce the risk of spending thousands on tooling before your design is stable. You also avoid waiting several weeks for a mold that may become obsolete after one design revision.
Vacuum casting prototype vs CNC machining
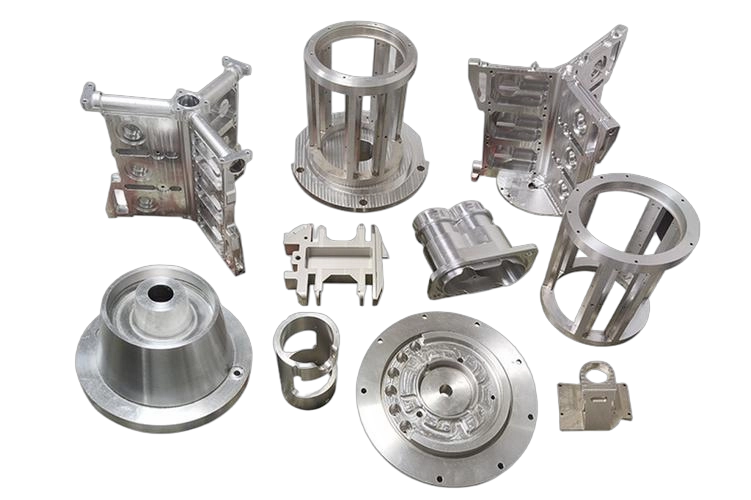
CNC machining is usually the better choice when tolerance is critical, the material must match an engineering-grade thermoplastic or metal exactly, or the geometry suits subtractive manufacturing. We often recommend CNC for functional interfaces, threaded features, precision slots, bearing seats, and assemblies that depend on repeatability down to very tight dimensions. In our broader machining work, tolerances can reach ±0.002 mm for suitable features and setups. Vacuum casting is not competing in that range.
A vacuum casting prototype is better when your priority shifts from precision-only to product realism. It can reproduce cosmetic textures, complex curves, thin walls, and molded-style details more naturally. It also becomes cost-effective once you need several identical parts instead of one or two. If your team wants twenty enclosure shells for assembly trials, machining each one from solid stock usually creates unnecessary cost.
There is a trade-off. Silicone molds wear over time. Depending on geometry, resin, and finish requirements, one mold may produce roughly 10 to 20 good parts before quality starts to drift. That means vacuum casting is a bridge process, not a long-run manufacturing method.
Where vacuum casting prototype work creates the most value
The best use cases are usually tied to decision points. A product team needs to confirm ergonomic feel before design freeze. A buyer needs a realistic sample set to support internal approval. An OEM needs pre-production units for limited field testing. An automation equipment company needs low-volume covers or housings that look finished for a machine launch.
In those cases, cosmetic quality is not just a visual issue. It affects stakeholder confidence, user feedback, and even sales timing. A rough prototype can hide a good design. A realistic prototype can reveal whether the product is actually ready.
Medical device housings, consumer electronics shells, control panels, automotive interior samples, and equipment covers are typical candidates. So are transparent lenses and fluidic covers, though clarity requirements need careful discussion early because not every clear resin behaves the same way under real use.
Material and performance limits you should not ignore
This is where many prototype projects go off track. Buyers hear that vacuum casting can mimic ABS, PP, PC, or rubber, then assume the performance will fully match molded production material. It usually will not.
Polyurethane casting resins can simulate hardness, flexibility, and surface appearance fairly well. They do not always deliver the same long-term thermal stability, UV resistance, chemical resistance, or impact profile as true production-grade molded materials. If your part will face high heat, repeated mechanical load, aggressive chemicals, or regulatory testing, you need to treat resin selection carefully.
A vacuum casting prototype is excellent for fit checks, light functional validation, and presentation parts. It is less reliable as the final proof for extreme-duty use. That does not make the process weak. It simply means the engineering question must match the process capability.
Wall thickness also deserves attention. Very thin sections, sharp corners, and deep narrow ribs can be reproduced, but part quality depends heavily on mold design, venting, and resin flow behavior. We advise customers to review these details during DFM instead of assuming the CAD model will transfer perfectly.
Lead time, cost, and revision speed
For most development teams, this is the real reason to choose vacuum casting. Tooling for injection molding may take weeks and carry a significant upfront cost. CNC can be quick for one part, but per-part cost stays relatively high as quantity grows. Vacuum casting lowers the entry cost for small batches and keeps revision cycles manageable.
A typical workflow includes creating the master, building the silicone mold, casting the parts, then trimming and finishing. If the design is stable and files are clean, prototype quantities can move quickly. The exact schedule depends on geometry, resin, finish, and whether the master needs secondary work, but the process is generally well suited to compressed development timelines.
Revision economics are also favorable. If you change the design, you are updating a master and mold rather than replacing an expensive steel tool. That makes a vacuum casting prototype especially useful during late-stage design refinement, when visual and assembly issues are still being solved.
What determines part quality
Good vacuum cast parts start long before the resin is poured. The master model quality drives much of the final result. Any print lines, machining marks, or surface defects can transfer into the silicone mold and then repeat across every cast part. That is why surface preparation matters so much.
Parting line strategy matters too. A poor split line can leave visible witness marks in critical cosmetic areas. Vent placement, gating, and resin selection affect whether sharp details fill cleanly or trap bubbles. Even color consistency requires process control, especially across multiple batches.
This is where supplier experience shows up in practical ways. A shop that understands low-volume manufacturing will flag cosmetic risk zones, suggest geometry adjustments, and tell you honestly when CNC, 3D printing, or injection molding would produce a better result.
How to decide if vacuum casting is the right next step
Start with quantity. If you only need one or two parts, CNC machining or additive manufacturing may be more direct. If you need dozens to low hundreds and the geometry or visual standard resembles molded plastic, vacuum casting becomes more attractive.
Then look at the purpose of the parts. Are you validating appearance, assembly, ergonomics, and basic function? Good fit. Are you proving long-term mechanical life, exact production material behavior, or ultra-tight tolerances? Another process is probably safer.
Next, check the budget against project risk. A vacuum casting prototype makes sense when it helps you avoid premature hard tooling and keeps a development program moving. That budget logic is often stronger than the pure per-part price.
Finally, review the part itself. Complex outer surfaces, consumer-facing finishes, and moderate batch sizes are favorable. Precision datums, high-load features, and heat-critical sections may need CNC-machined inserts, hybrid builds, or a different route entirely.
At 6CNC, we often see the best results when customers treat vacuum casting as part of a broader prototype strategy, not a standalone answer. One project may combine CNC for critical mechanical interfaces, vacuum casting for cosmetic housings, and later transition to injection molding after validation. That staged approach controls cost without hiding technical risk.
The most useful prototype is not the cheapest one or the fastest one. It is the one that answers the next business-critical question with enough accuracy to move your project forward.